Have you ever created a mood board? Did you know that an interior design mood board is an excellent way to determine your design style? While there are plenty of quizzes out there to help you find your ideal interior design style, a mood board can be even more effective. It should be your first step when starting a home renovation project. Before I give you the steps to creating an interior design mood board, let’s talk about what a mood board actually is.
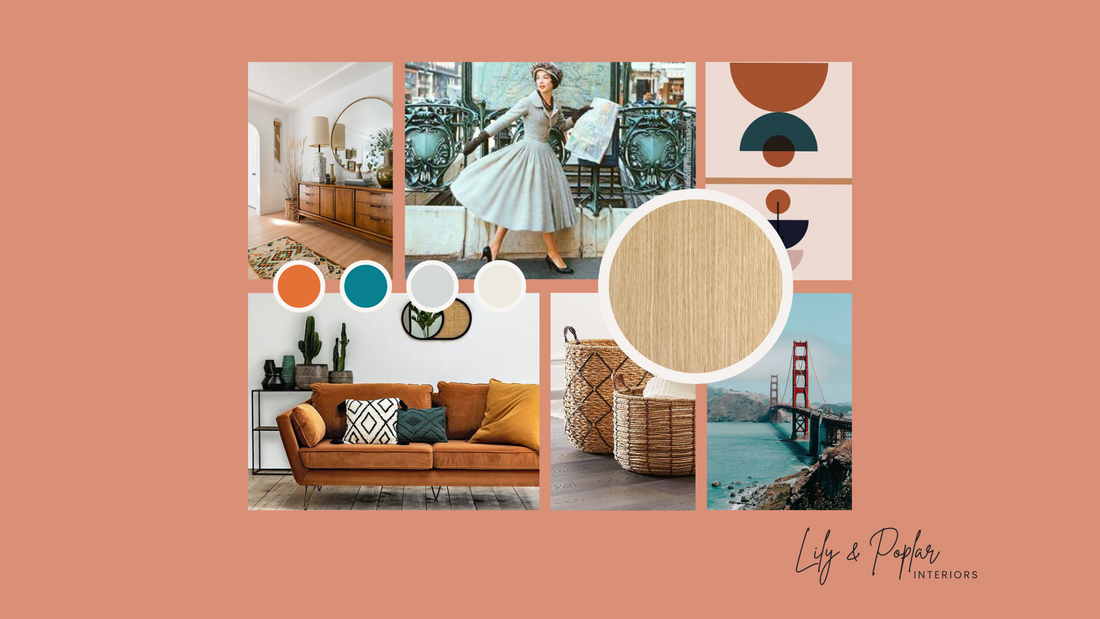
Mood boards are often used by Interior Designers as a tool to create an overall concept for a space. These boards can be physical or virtual and they help clients visualize the Designer’s intent. A mood board is not a literal interpretation but more of a preliminary design tool to get the ball rolling. I like to create interior design mood boards early in the process to get a sense of the client’s overall style and expectations for their space. I don’t often place actual products or finishes in my preliminary mood boards because it’s too early in the process for that. Good design involves learning about your client before making any assumptions. So the first mood board includes images that convey a particular style or overall design intent. If my client is happy and we are on the right track, then I start narrowing down the design and choosing actual finishes and products. Then I will create a finishes board which is different from a mood board. The finishes board (like the name suggests) includes actual finishes and products that will be used in the final design of the space. I’ll talk about finishes boards at a later date but today I wanted to show you how you can use mood boards for your space.
Whether you are hiring an Interior Designer to help you create the home of your dreams or you are tackling this on your own, creating an interior design mood board is going to help you immensely. A mood board will help you determine your personal style and help you narrow down your vision. There’s nothing harder than trying to design a space you love when you don’t have a good direction or intent. You don’t want to be aimlessly wandering around the home improvement store or furniture outlet because you have no idea what you are looking for. Creating a design mood board is easy and fun and doesn’t take too much time.
Follow these easy steps to create an interior design mood board and you’ll be able to define your design style in no time:
1. Create a board on Pinterest
Make a new Pinterest board so that you can keep your inspiration images organized. Then start scrolling through your feed and save any images that speak to you. These images don’t have to be exclusively related to interior design. Here is a list of topics you could pull inspiration from:
- Landscapes
- Fashion
- Textures
- Patterns
- Nature
- Furniture
- Time periods (ex. Mid Century)
- Colours
- Photography
- Art
- Food
- Music
- Font types
- Quotes/ Inspirational words
Once you’ve done this, look through your Pinterest board and see if there is a common theme within your images. Are there similarities in colour, style, overall feel? From there narrow down your favourites to include in your mood board. Select about 10 images or so. That will give you enough content to create a throughout board without it being too crowded.
2. Choose your mood board software
Now that you have compiled your inspiration images, it’s time to create your mood board. You can create a physical board or a virtual board. I’m going to focus on virtual mood boards in this article but if you want to create a physical board, I suggest using a white foam core board, double-sided tape or push pins. There are many free and paid software options when creating a virtual mood board. Here are a few:
- Canva (free and paid versions)
- Adobe Spark (free and paid versions)
- Adobe InDesign (paid software)
- Adobe Photoshop (paid software)
3. Choose your mood board template
You can certainly create your own template but there are so many free mood board templates available. The software options I mentioned above all have great templates to suit your particular style. I even created a few Canva templates to get you started. You can find them here. Once you’ve selected a template and you’ve narrowed down your images from your Pinterest board, you’re ready to start. Here are a few guidelines to creating a great interior design mood board:
- Create a balanced board by arranging images in a way so that similar content is across or diagonal from each other. For example, if you have 2 images of interior spaces, don’t put them next to each other.
- Feel free to edit, crop or remove the background on images so that the focus is on what you think is important in that image.
- Does your template include both landscape and portrait type images? Make sure and organize your images accordingly so that they fit within the frames.
- Colour swatches are a good thing to include in your board. Pull common colours from your images to create a cohesive mood board.
- Allow for white space. Overlapping images can sometimes feel messy and squished. Keep some white space in between images so that each image reads as its own and the board feels organized.
You spent time creating your design mood board. Don’t forget about it! Hang it on a wall in the space that you are designing so that you are reminded of your overall vision throughout your renovation process. Add it to your phone so that when you are out sourcing finishes and products you can access it quickly. And send it to your Interior Designer as soon as you hire her so that she can get a sense of your overall design style right away.
An interior design mood board is an essential step to the design process. Don’t get ahead of yourself and jump right into a design project without reflecting on your personality and what you are drawn to. Without a mood board, you’ll risk being quickly overwhelmed and discouraged. Home renovations, while demanding, should be a fun process and most importantly, you should be happy with the end result.
Ready to create your interior design mood board? I’ve put together a few mood board templates in Canva to help get you started. As I mentioned, Canva is a free program and with my templates, all you have to do is upload your images and plop them in! You can grab my templates here.

